I use natural and cut them in to smaller pieceAre you guys using natural sponges regular household sponges?
-
If you are being asked to change your password, and unsure how to do it, follow these instructions. Click here
You are using an out of date browser. It may not display this or other websites correctly.
You should upgrade or use an alternative browser.
You should upgrade or use an alternative browser.
Not happy with my painting technique
- Thread starter Blacklab1
- Start date
 Help Support Long Range Hunting Forum
waspocrew
Well-Known Member
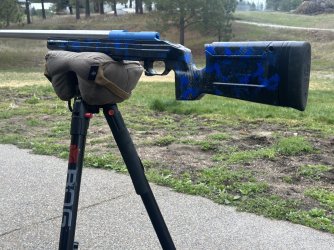
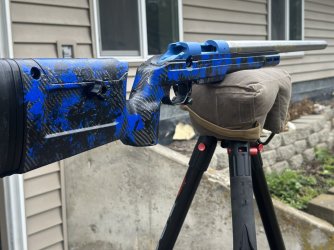
His and hers 22lr rascals for my kids. Use a clear coat over it and the paint should last quite a while.


Last edited:
Rick Richard
Well-Known Member
Those are super cool.His and hers 22lr crickets for my kids. Use a clear coat over it and the paint should last quite a while.
View attachment 599968View attachment 599969
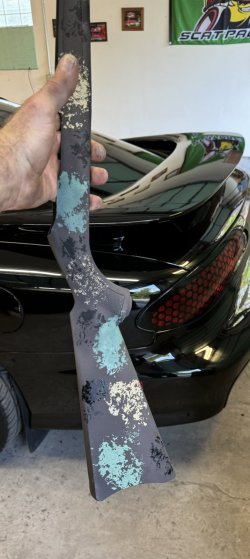
Thanks guys, now I'm starting to get somewhere. I got done with work early today and had a little time to experiment, all the videos I watched no one mentioned to wet the sponges before they were used, I had it in my mind that you wanted them on the stiffer side but that's not the case. After they were wetted things started coming together for me. A little more practice and I'll be ready to do my McMillan.
Attachments
Looking goodThanks guys, now I'm starting to get somewhere. I got done with work early today and had a little time to experiment, all the videos I watched no one mentioned to wet the sponges before they were used, I had it in my mind that you wanted them on the stiffer side but that's not the case. After they were wetted things started coming together for me. A little more practice and I'll be ready to do my McMillan.
It takes some practice to get a feel for the amount of pressure needed to apply the sponge. Too little, not enough paint. Too much you lose all the pattern from the sponge.
Are you wetting the sponge with water or thinner?Thanks guys, now I'm starting to get somewhere. I got done with work early today and had a little time to experiment, all the videos I watched no one mentioned to wet the sponges before they were used, I had it in my mind that you wanted them on the stiffer side but that's not the case. After they were wetted things started coming together for me. A little more practice and I'll be ready to do my McMillan.
Are those the target model? I'm looking for something for the younger kids that might not make the age limit for the giveaway I do.His and hers 22lr crickets for my kids. Use a clear coat over it and the paint should last quite a while.
View attachment 599968View attachment 599969
I wet it with water and let it sit for an hour or so after wringing it out really good. Made a world of difference.Are you wetting the sponge with water or thinner?
waspocrew
Well-Known Member
Those are super cool.
Thanks! Was happy with how they turned out. I'll probably do my Howa mini stock in the orange pattern soon.
waspocrew
Well-Known Member
Are those the target model? I'm looking for something for the younger kids that might not make the age limit for the giveaway I do.
Yep, the rascal target XP. From scheels, it was a pretty good deal for $290. Threaded barrel, scope, and bipod. They love them.
looks good to me.I'm trying to figure out how to do a decent camo paint job for my new rifle. I tried sponge painting and a Bob Ross approach with dabbing a round brush but I'm not really happy with either one. I'm trying to get close to something like a Manners sponge paint like the one I have a picture of but can't seem to get the bigger blotches. I tried trimming the natural sponge into different shapes but it's just not working out. I tried different pressures but if I press too hard it turns into a smudge and too light it's more like speckled. Any advice on how to get closer to a Manners?
rolltide
Well-Known Member
You can go broke finding "good deals"
You need to decide what you'll be happy with and stick to it. Otherwise you'll be upgrading forever.
This stock only had the Olive spots from Manners. I added the grey and light green, plus a matte clear coat.
View attachment 599907
View attachment 599908
This stock only had the Dk grey from Manners. My buddy wanted a LOT of orange, and some lighter grey spots.
View attachment 599909
View attachment 599910
This was originally a Manners GAP camo, but there was a lot of black left. So I added the darker tan and the lighter sage green to fill in some of that black. Then matte clear overcoat.
View attachment 599911
View attachment 599912
This had the Manners Tan/grey. I added the orange for some "pop" on these next two rifles.
View attachment 599913
View attachment 599916
View attachment 599917
View attachment 599915
I have a bunch of rattle can paint jobs too, if you want reference.
Those are exceptionally nice...


