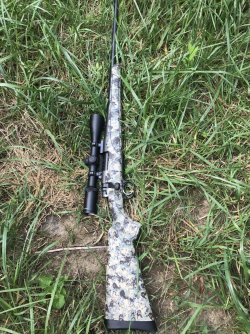
I'm trying to figure out how to do a decent camo paint job for my new rifle. I tried sponge painting and a Bob Ross approach with dabbing a round brush but I'm not really happy with either one. I'm trying to get close to something like a Manners sponge paint like the one I have a picture of but can't seem to get the bigger blotches. I tried trimming the natural sponge into different shapes but it's just not working out. I tried different pressures but if I press too hard it turns into a smudge and too light it's more like speckled. Any advice on how to get closer to a Manners?
You are using an out of date browser. It may not display this or other websites correctly.
You should upgrade or use an alternative browser.
You should upgrade or use an alternative browser.
Not happy with my painting technique
- Thread starter Blacklab1
- Start date
Sponge painting stocks?
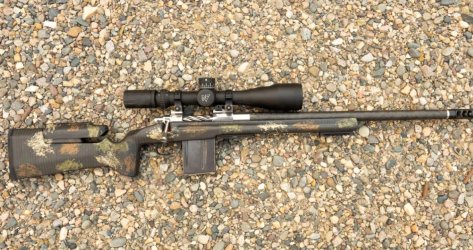
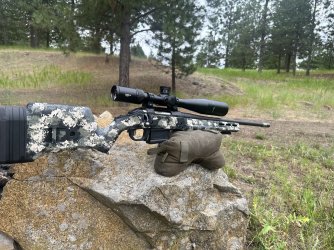
here’s a couple i done last year. the Christensen Ridgeline 280 Ackley got stolen so if anyone happens across it i’d really appreciate the info on it.
your local hardware store will have large pore paint sponges for drywall texturing and other painting sponges as well. Also check a Sherwin Williams or other paint store in your area. The type of paint will determine how long it will last.
Household sponges torn up. Certain paint works better than others also. This is done with Pro-Line RC body paint which is what Manners uses. It stands up to most solvents .


Last edited:
adk hunter
Well-Known Member
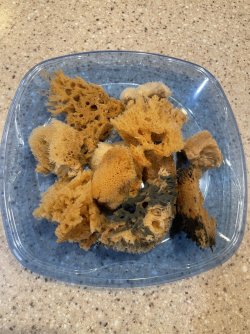
Natural sponges.
Do a mock up of a stock with cardboard and use water to get the feel and right part of the sponge you prefer. I also spray the paint on cardboard and dip the sponge in it. Dab a few times to get the pressure and amount of paint on cardboard then go to the stock.
Do a mock up of a stock with cardboard and use water to get the feel and right part of the sponge you prefer. I also spray the paint on cardboard and dip the sponge in it. Dab a few times to get the pressure and amount of paint on cardboard then go to the stock.
birddog 68
Well-Known Member
Hello adk hunter and thanks for your thread a while back.
Here's the thread a picture of my first stock paint job.
Here's the thread a picture of my first stock paint job.
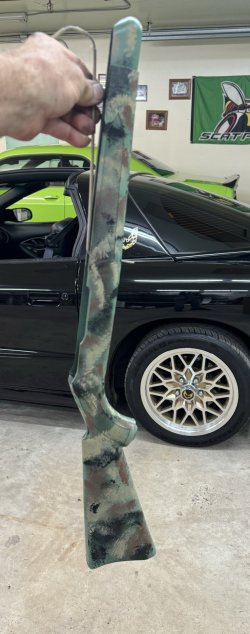
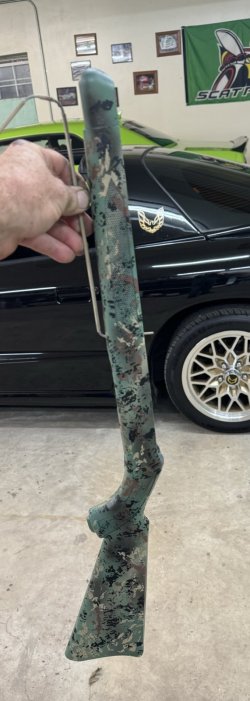
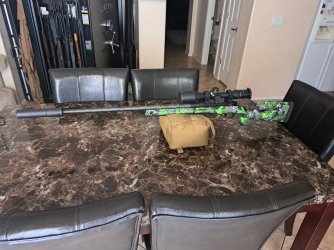
I thought I would post some photos of my project.
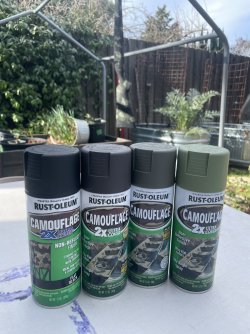
First rifle I decided to do instead of getting dipped to make it my own.
I bought several cans or a green color and settled on Rust-oleum's green camo, dead flat clear and Montana can's Black marble effect.View attachment 478008View attachment 478009View attachment 478010View attachment 478011
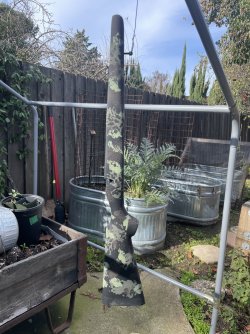
I wasn't too concerned about getting the webbing perfectly to the very edge so taped past the exact edges. I did some practice passes on a box and went for it. I wanted it to be lightly done and was a little worried it would be rough or edgy. First pass was 95% and I gave a few light touch up shots around the grip and the top of the comb where I had it laying. Because it is so humid here I put in drying chamber
Wifey is in Italy! The dead flat clear coat didn't spray on so nicely but I did get it even. It did darken the green some.
Overall I learned a couple things but couldn't be happier.
Just wanted to share and encourage someone if you think this is difficult it isn't!

Attachments
By a large pour-us type sponge and tear it apart, (don't cut) tear the sponge and also pinch off small chunks to make it rough,
This is what your looking for. Spray paint some paper plates matte black for a practice canvas, Now you test out your patterns
This is what your looking for. Spray paint some paper plates matte black for a practice canvas, Now you test out your patterns
Exactly this.Natural sponges.
Do a mock up of a stock with cardboard and use water to get the feel and right part of the sponge you prefer. I also spray the paint on cardboard and dip the sponge in it. Dab a few times to get the pressure and amount of paint on cardboard then go to the stock.
Get the natural sponges from a craft store and soak them in water to soften them.
Pick out some different irregular shapes and sizes.
Practice on the cardboard first!
I added a clear coat after the sponge paint to protect it. Attached photo is before clear coat.
Good news is you can just paint that stock black and start again.
Attachments
Dr. Vette
Well-Known Member
As noted, natural sponges from the craft store used in larger chunks.
If you use spray paint, I spray it into disposable bowls (the containers from veggies from the store) and use the paint from the bowl. It doesn't take long before that paint starts to dry and clump, and you need to use a different area of the sponge as well as a different area of the bowl.
Afterwards I used the webbing paint and clear.
Which webbing paint do you use? I was looking for something to add texture.Afterwards I used the webbing paint and clear.
Dr. Vette
Well-Known Member
Krylon Marbelizing spray.Which webbing paint do you use? I was looking for something to add texture.
Be sure to practice with it. Trust me.
")