• If you are being asked to change your password, and unsure how to do it, follow these instructions. Click here

1st Solo Bedding Job

I don't usually post negative coments but your methods are poor and the outcomes/results are crap. I cannot suggest anyone follow your recomendations. A good bedding job should look entirely different than that outcome.
This place is turning into Reddit. Pure hysterics and unsolicited judgmentalism. You didn't bother asking him how the rifle shoots or if any of the ghastly flaws you've had a stroke about impact a single thing.
 
just wondering why you are bedding it? AG says that is not needed, I hope so as I will be receiving one next month. did you have issues with their job or you just wanted it more solid? thanks
The only thing I don't care for is it has a lot of slop when you set the action in the stock, it is machined excellent and it fits very well, but the recoil lug area is very big. It is hard for me to describe, it worked fine unbedded, the groups were good, but I want to set my barreled action in the stock and not have it move sideways or rotate freely while I am trying to torque it down. At least now, when I set it in, it is level and I am not reaching for levels to put in the bolt raceway and top of picatinny rail. Sometimes, I would get a three shot group and have another shot stray out of the group. I am just trying to eliminate anything that could be an issue down the road and also, give myself some practice on bedding. By no means is this a sign of AG Composite stock not working. When you receive your stock you will understand what I mean when I mentioned the recoil lug area.
 
The only thing I don't care for is it has a lot of slop when you set the action in the stock, it is machined excellent and it fits very well, but the recoil lug area is very big. It is hard for me to describe, it worked fine unbedded, the groups were good, but I want to set my barreled action in the stock and not have it move sideways or rotate freely while I am trying to torque it down. At least now, when I set it in, it is level and I am not reaching for levels to put in the bolt raceway and top of picatinny rail. Sometimes, I would get a three shot group and have another shot stray out of the group. I am just trying to eliminate anything that could be an issue down the road and also, give myself some practice on bedding. By no means is this a sign of AG Composite stock not working. When you receive your stock you will understand what I mean when I mentioned the recoil lug area.
I have the same issue with my Christensen and I feel like it needs it done to snug everything up.
 
Ok, bed the recoil lug, put tape on the bottom of the recoil lug. Using a small jewler's file, put a 45* angle on the sides of the recoil lug for easier removal.

Use the experiment to learn something. First, bed rear, both sides, and front. Now, shoot the rifle. Then using a dremel, relieve the sides and front of the recoil lug.

The lesson learned will last you the rest of your life.

This takes little effort for very positive results.
 
Material list will probably not set good with a lot of people, but I used JB Weld the strongest they offer for bedding compound, and for release agent, I used Brownells Acra Release agent aerosol. The other stuff is electrical tape around the recoil lug and in front of it, then used painters tape on all items I did not want bedding compound on. For filling in the trigger hanger, trigger pins, any openings on receiver, I used modeling clay from Hobby lobby.
I use pretty much the same material list except I use Surg tubing instead of zip-ties. I doubt there's a hill of beans of difference.

When using JB, rubbing alcohol on a Q-Tip will clean it up really nice if it hasn't set yet. I like the "harder" pointed Q-Tips:

Pointed Q-Tips

Somewhere between 6-8hrs I pull the guide bolts, install the bottom metal, and torque the stock down like I would during any assembly. Syn/pillars, 65#. Then clean-up the squeeze-out. Get the big chunks off w/utility knife blade and final cleanup w/alcohol and q-tips.

Exacto-knives work well for getting the painter's tape cut so there's no overhang where you want bedding compound. They're finer than utility-knife blades.

X-Acto Knife
 
Last edited:
As an Amazon Associate we earn from qualifying purchases.
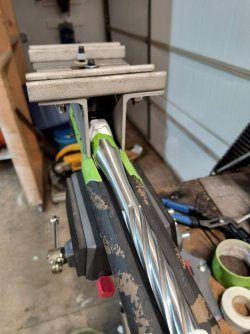
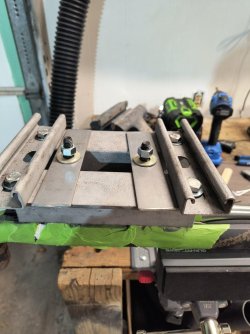
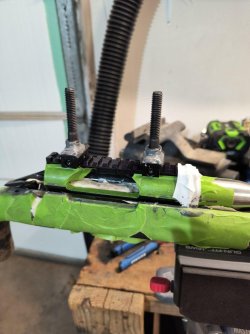
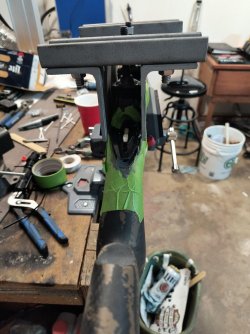
I am too tickled how it turned out, my jig worked like a charm and came straight out. I still have to clean it up, but will do that when I am not on the clock for my other job.
The Jig
 

Attachments

  • IMG_20240617_093135021.jpg
    IMG_20240617_093135021.jpg
    231.3 KB · Views: 230
  • IMG_20240617_093144827_HDR.jpg
    IMG_20240617_093144827_HDR.jpg
    198.2 KB · Views: 236
  • IMG_20240617_093157427.jpg
    IMG_20240617_093157427.jpg
    223.8 KB · Views: 224
  • IMG_20240617_093248400.jpg
    IMG_20240617_093248400.jpg
    178.5 KB · Views: 224
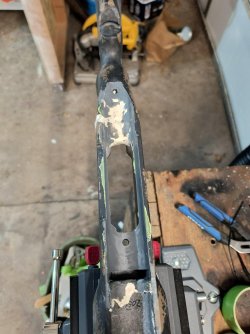
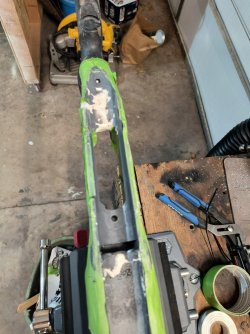
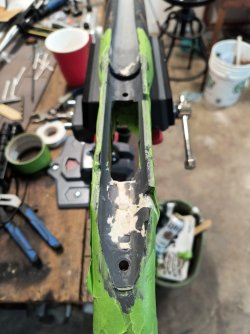
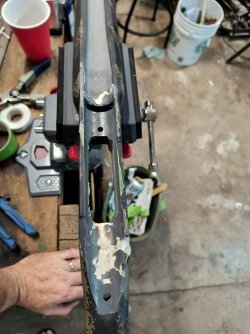
I guess it would help if I included the pictures of the bedding... I have not cleaned it up, it had been setting up for 64 hours, before I pulled it. I just wanted to be sure everything was set hard before pulling, I did not want chipped edges in case it had not cured long enough.
 

Attachments

  • IMG_20240617_094013160_HDR.jpg
    IMG_20240617_094013160_HDR.jpg
    214.1 KB · Views: 262
  • IMG_20240617_093725374_HDR.jpg
    IMG_20240617_093725374_HDR.jpg
    265.5 KB · Views: 253
  • IMG_20240617_093734100.jpg
    IMG_20240617_093734100.jpg
    201.2 KB · Views: 246
  • IMG_20240617_094004600_HDR.jpg
    IMG_20240617_094004600_HDR.jpg
    207.1 KB · Views: 261
I guess it would help if I included the pictures of the bedding... I have not cleaned it up, it had been setting up for 64 hours, before I pulled it. I just wanted to be sure everything was set hard before pulling, I did not want chipped edges in case it had not cured long enough.
I believe someone else mentioned about pulling your tape off before it sets hard. We do this when painting cars. Once it starts tacking up we begin to untape very slowly. And careful to the direction in which you pull the tape. This may help you in the future to save time on cleanup. You decide. And if you ever wet sand and leave the tape on for a few days & dry. You will find out real quick why 3M tape is top notch.
 
I believe someone else mentioned about pulling your tape off before it sets hard. We do this when painting cars. Once it starts tacking up we begin to untape very slowly. And careful to the direction in which you pull the tape. This may help you in the future to save time on cleanup. You decide. And if you ever wet sand and leave the tape on for a few days & dry. You will find out real quick why 3M tape is top notch.
Yes sir, I noticed how it was tearing, lesson learned by each one, I will use that little nugget on the next for sure. I was just tickled the edges did not break when I pulled it out.
 
Yes sir, I noticed how it was tearing, lesson learned by each one, I will use that little nugget on the next for sure. I was just tickled the edges did not break when I pulled it out.
After taking the tape off. If you are worried about more bedding compound coming out during the process. You can always retape along the edge with 1/2 inch or whatever tape you have. I have learned over the years. Tape is cheap compared to my time.
 
Top