• If you are being asked to change your password, and unsure how to do it, follow these instructions. Click here

How is any sporterized rifle with a 2 piece scope base accurate?

Assume the rings are for 1 inch scope. Do not use a scope to validate mechanical alignment. Go to your local hardware store and buy round metal stock in 1 inch diameter and at least 18 inches long (36" good too as you can see obvious errors). With a steel wool <Brillo> pad (fiber leaves fewer filings) smooth and clean the aluminum stock smooth. Care not to take off too much, but enough to not damage rings. The round stock is perfect as a bar to twist rings into base and to get rear base alignment screws centered as a good starting point. With this round stock you can put base bedding, shims, JB Weld, or other attaching devices without ruining your scope. Similar refined stock was sold years ago in scope mounting tool kits.
Generally sound idea. The problem is that the metal sold in those locations isn't truly round, very straight, or at the exact diameter. Instead, buy something like this: Ø1.00 X 12" Linear Motion Shaft $22.84 It is all of those things.

I have a round top Savage that has a bedded one piece base because even though the screw holes are on-center the action itself is not actually round. This caused the base to tilt and was about .01" low on the left.
 
I personally prefer the two-piece scope bases over the one-piece bases because they give more access to the ejection port for loading and unloading the rifle. I have several rifles with two piece bases, all of these rifles have been lapped. Unless the rings on any rifle have been line bored, after they have been mounted to the bases, there is always going to be some misalignment in those rings. There are too many variables within the mounting system to "not" have misalignment. If one follows the many posts on bedding scope rings and bases, most every brand/make of scope ring/bases are mentioned in these posts; including the most expensive scope/mounting systems. Most of my rifles are Ruger 77s that have the integral scope bases, even with these there is some misalignment, plus Ruger rings are not perfectly machined round/cylindrical from the factory. I also have a few round-top Ruger 77s that use Remington 700 scope bases, these too always show some misalignment that lapping will always bring back to perfect after lapping. When I lap my rings in, I always put a witness mark on the rings to ensure that they are put back in the same manner that they were lapped in. I use a center punch to mark the front ring with a single punch mark on the top and on the bottom ring. I so the same process with the rear ring, only I put two punch marks on the top and the bottom ring. So no matter what I do with scope mounting or replacement the rings will always go back together in the same way they were lapped in place. If I use the lapped rings on another rifle, I repeat the same process and lap the rings back in again so the rings are lapped as they are mounted on the different rifle. I am not a professional gun smith by any means, however I have mounted many, many scope bases and there are not any that I have installed where lapping has not been necessary to align the scope rings. My suggestion would be to mount your scope bases to your rifle and then lap the rings. The lapping process will indicate if your scope bases are misaligned and then you can go from there. If the rings are too far out of alignment, then it is time to visit a gun smith. One could weld those scope bases on, unless the bases are held aligned with a solid bar of steel between the front and the rear ring there will be misalignment. Even using this method with the solid bar of steel, the stresses in the weld could create some misalignment. Good luck with your project, it sounds interesting.
 
plenty of those sporters had their bridges ground free hand as well and are in no way even with each other.
Now if you were a classy gentleman you would smoke fit some steel blanks onto the bridges and align the action with fitted blank blocks into the mill and cut both bases there to ensure alignment and consistent height.

then again you'd use a nice set of old verticle split Talley rings as well.


that was back when instead of truing the receiver they just put the Mauser in the lathe and did a clean up pass on the face
 
Generally sound idea. The problem is that the metal sold in those locations isn't truly round, very straight, or at the exact diameter. Instead, buy something like this: Ø1.00 X 12" Linear Motion Shaft $22.84 It is all of those things.

I have a round top Savage that has a bedded one piece base because even though the screw holes are on-center the action itself is not actually round. This caused the base to tilt and was about .01" low on the left.
I left out the most important part. I used J-B Weld epoxy to set the rail square. It took some thinking to figure out how to clamp a 20 MOA rail square on a round action. I used a matching 20 MOA rail reversed 180° along with the fixture that I made to hold the action in the mill to clamp the rail square while the epoxy cured.
 
@Technologist
I have to congratulate you Swedes, you make the best chainsaws and concrete cutting tools by Husqvarna on the planet. Their rifles were fantastic too, as well as Carl Gustav…

Cheers.
Case in point, a $350 gunbroker gem, husqvarna 1640 30.06, tally base ring combo, some days I swear it out shoots my $3000 rifles. IMG_3249.jpeg
 
Help me understand your purpose. You have a rifle designed 130 some years ago, made in 30 some countries. I see you are from Sweden, When it was drilled for a side mount it may have been for any number of available scopes with diameters from 3/6 to 26mm many of which did not have windage adjustments. The mounting holes on the top of the action may or may not be aligned which should probably be addressed along with the height. Note the popularity of 20 to 50 moa bases. This is what we used to call Ga. precision machining,
"measure with a micrometer
mark with chalk
cut with a chain saw"
Decide what your objective is and then how much you are willing to spend to get there,
kind regards
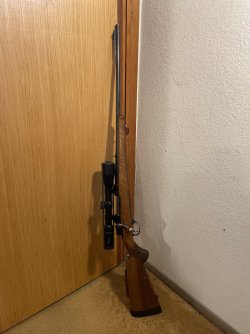
I want to set up one of the family heirloom rifles as a proper, ready to go hunting rifle that will be accurate and reliable. If there is a lot of misaligned tension in the scope mount, I'll worry the scope base screws will break again.

Some fine people have suggested various ambitious courses of action involving lathes and jigs. Others have proposed that I ignore the misalignent and just screw the pieces together.

How about this for a middle of the road fudd home gunsmith solution:

First a separate, straight, piece of picatinny rail to mount decent rings to a seemingly straight scope. I then decide which of my loose scope bases appears to be taller than the other (with respect to the top surface on which the scope mount stands). Could possibly create a difference in height with a thin shimming operation, but holding the rifle to flat surfaces make it seem as if the front base is true and the rear is unaligned and lower than the front.

The base which appears taller and truer is left screwed in place while I put a smudge of some bedding compount beneath the other. I then use the scope with the prepared scope rings to force the floating base in alignment with the screwed fixed base.
 
If you are worried about breaking screws, drill the holes out for 8-40's. As far as alignment problems, I have used Burris Signature rings for years. You can get the ring inserts in various thickness. Never failed to cure any alignment problems. Plus, as one person said, they will not mar your scope tube. If you are worried about the scope moving, I have a 458 that weighs 8.5lbs with scope and a magazine full. Have shot it over 100 times and the scope as never moved.
 
I have heard of people putting a skim layer of JB weld and then screwing the bases on. Doing this will stop any rocking or movement that could ever occur.

What I would then do, is get a set of Burris Signature rings. These have the nylon ring inserts that you can play around with for elevation, but by turning a pair of offset ring inserts, you can also correct R>L or L>R skew.

And the Burris rings won't mar your scope. I cannot figure out why more people don't like them. The idea that the plastic inserts are unable to hold the scope is unfounded.
I have a Remington 700 that I used the Burris rings and offset inserts for. The screw mount holes must have been drilled wrong from the factory and I didn't want to deal with shipping it back, etc. plus I bought it used. And yes, one set of offset inserts are mounted sideways as it was the only way to get the scope aligned with the bore. And like cdherman said, they don't mar the scope so it's relatively simple to tweak them. They work.
 
If you are worried about breaking screws, drill the holes out for 8-40's. As far as alignment problems, I have used Burris Signature rings for years. You can get the ring inserts in various thickness. Never failed to cure any alignment problems. Plus, as one person said, they will not mar your scope tube. If you are worried about the scope moving, I have a 458 that weighs 8.5lbs with scope and a magazine full. Have shot it over 100 times and the scope as never moved.
It cost me an insane (for a set of screws) amount of money to get the spare screws that I have. I love to measure my bullets in inches and my powder in grains, but you guys are really missing out when it comes to screws. If I ever have to re-tap those holes it's going to be in M4. But the advice is taken, that a larger diameter screw might be a solution.

I am intrigued by the method described in this thread, however:


Here is the procedure I used;

  1. Degrease the bottom of the scope bases and the top of the receiver where they mount.
  2. Apply plenty of release agent to the scope base screws and to the inside of the screw threads in the receiver.
  3. Apply epoxy to the bottom of a scope base, keeping it out of the screw holes.
  4. Holding the base in one hand, drop the two screws through the holes with the other. The idea is to get the screws in place without getting any epoxy on the threads.
  5. Carefully position the base and start the screws into the receiver threads without the bottom of the base making contact.
  6. Gently and evenly turn the screws until the base makes contact with the top of the receiver. At this point, the screws should have engaged the receiver threads a few turns and will prevent epoxy for entering
  7. Tighten the screws until SLIGHTLY SNUG but not too tight. The idea is that the base should be close to tight but still free to shift in the epoxy.
  8. Repeat with the second base.
  9. Install the lower half of the rings on the bases and snug them so they will not move.
  10. Place the alignment bar/lapping tool in the bottom half of the rings.
  11. Install the top half of the rings.
  12. Install the ring screws and tighten them down just as you would as if you were mounting the scope. As you tighten the ring screws, the alignment bar will bring the rings into perfect alignment, shifting the scope bases in the epoxy to allow the rings to align.
  13. As the epoxy begins to set, you can clean the excess with Q-tips wetted with WD40. Be careful not to disturb the bases.

Once the epoxy sets, remove the alignment bar and the rings from the bases (be sure to place the rings back on the same way they were removed). Remove the base screws, clean and reinstall with blue Locktite, torqueing them down the normal amount. The bases will now be solidly attached on the receiver, with no worries of them coming loose. If you install the rings on the bases the same way you took them off, the rings will be perfectly aligned - which is always a good thing when it comes to the scope you are mounting in them!
 
Top