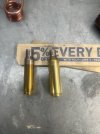
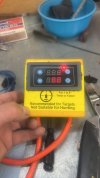
Dead set to build inductance annealing apparatus.

I have been working on an induction annealer based on the MGNZ board for a while now and have it at a point that it seems to be working fairly well. It still needs some tweaking but overall i'm happy with it and am planning on doing some annealing testing on brass soon.

I've been using fiberglass heat shield sleeving from amazon to help protect the coil from shorting out through any contact. I think it helps in getting a better wind of the coil as well.

Another consideration is while a lot of people seem to have luck with the 1/8 copper tube, I switched to the 1/4 as it was easier to get and could get better coolant flow.

Tech Dregs has a good youtube video on the process he went through in making his coil.
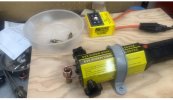
Thanks for the video link. Very helpful. Impatience was the main culprit for the death of my ZVS. I have the fiberglass insulation on the way but it is on that same slow boat from china as my meter. Also, nothing is tied down yet as it all still experimental. Anyway, lesson learned.
 
this coil is single layer, 0.75 uH, final will be duel layer and closer to 1.0
when I get the insulation for the tubing and get cooling water flow, should be able to cut that time in half

the hold up; I could buy 6' of high temp insulation for $9 and get it in a few days. OR. I could get 33' for $6 direct from china. It takes a while.

Couldn't get the youtube thumbnail thing to work but this address will take you to video.
will build manual trap door after coil build, have to be sure its correct height.


1687052936293.png
 
this coil is single layer, 0.75 uH, final will be duel layer and closer to 1.0
when I get the insulation for the tubing and get cooling water flow, should be able to cut that time in half

the hold up; I could buy 6' of high temp insulation for $9 and get it in a few days. OR. I could get 33' for $6 direct from china. It takes a while.

Couldn't get the youtube thumbnail thing to work but this address will take you to video.
will build manual trap door after coil build, have to be sure its correct height.


View attachment 471095

Very nice! Always satisfying seeing those neck glow. What is the inner diameter of your coil, and what brass are testing with in the video?
 
Very nice! Always satisfying seeing those neck glow. What is the inner diameter of your coil, and what brass are testing with in the video?
That particular coil is 22mm ID, 7.5 turns, 12awg. Just having fun experimenting with different coils. The final coil, calculations from link earlier in this thread, should be 16mm ID, duel layer 4 inside turns 3.5 outside turns, 1/8" tubing. I am certain that coil will need to be water cooled to have reasonable production rate. That was the remains of lapua brass and 4.5 seconds would be a little more appropriate but 5 was more dramatic. One other important note, any uH figures I give are taken with a $15 meter from china
 
Not sure on that.
That timer switch I'm using is controlling an automotive type relay rated at 80amp
Could you do like a single phase 240 (example) 2 incoming at half power or use 2 coils at half power with 2 controllers? I'm guessing there's no contact with the copper, only induction?
 
HIU Buddy, I own the Burst Fire Annealing Machine. Not expensive, fully adjustable for time of heat on the case neck. Several added case prep features and very easy to use, with a standard ( Home Depot) propane bottle. You may want to take a look at it. They have videos.
 
I have a set of plans for a similar build then went the east route and did this:
 

Attachments

  • IMG_9793.jpeg
    IMG_9793.jpeg
    85.5 KB · Views: 81
  • 69672098543__C537AB53-C609-4101-800A-BC19A0FDD780.jpeg
    69672098543__C537AB53-C609-4101-800A-BC19A0FDD780.jpeg
    1.5 MB · Views: 81
  • IMG_9786.jpeg
    IMG_9786.jpeg
    150 KB · Views: 80
HIU Buddy, I own the Burst Fire Annealing Machine. Not expensive, fully adjustable for time of heat on the case neck. Several added case prep features and very easy to use, with a standard ( Home Depot) propane bottle. You may want to take a look at it. They have videos.
If it all ends up in the can, that would be top of list
Thanks
 
BrentM:

How did you wind that nice coil? I've been wanting to make some. I have the same heater you do.
just wound around pipe and used feeler gauge to separate. Got a variation in mind for the finale. If it works I'll send pictures. Usually get things 1/2 right on the second or third try.
 
Top