On going on record to explain how I've changed the excellent Audette ladder load development system.
Using the different colored markers is an excellent idea. The problem i've run into with this is that depending up the distance, caliber size and quality/power of spotting/rifle scope, the shooter may not be able to see the impacts down range "while" shooing the ladder. When shooting a ladder it is necessary to see/know which shot/impact is which. In addition, if you call a bad shot, you need to know which impact is the bad shot.
A friend of mine from Albuquerque taught me a new technique; home made DirtyBird or Shoot N See targets. Targets that leave a large black impact on a light/white colored backing. I take an 8'x4' sheet of plywood or similar sheet of stiff backing material and cut it in two so I have two 4' x 4' sheets. I then buy a roll of black plastic. Mine was about 20' x 8'. I cut that down to 4' x 4' sheets which are stapled to the plywood. I then take a $.97 cent can of white spray can and spray the entire sheet of black plastic, white. Let it dry and add bright orange aim points. Select your desired distance to shoot at and let fly. With my Zeiss 15-45x spotter I can easily see 22 cal hits at 660 yds. When the bullet hits, the white paint, directly around the impact hole, chips off, exposing the black plastic, easily seen at extended distances.
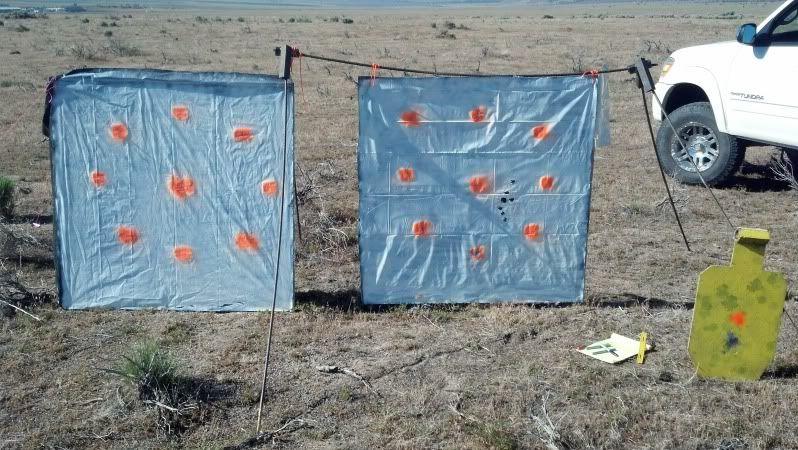
Above you can easily see my LV Steel 1/2 silhouette, used as a sighter target then looking at the right 4'x4' DirtyBird target you can see my ladder; 3 shots upward, 3 shots across (accuracy node) and 2 more shot above that.
That's my target. How I bring loads to the range is new as well. We all know that BR shooters load their ammo at the range. I modify that by bring prepped and charged cases to the range and seat bullets "as necessary". Below is an MTM ammo boxes with 100 prepped and charged cases.
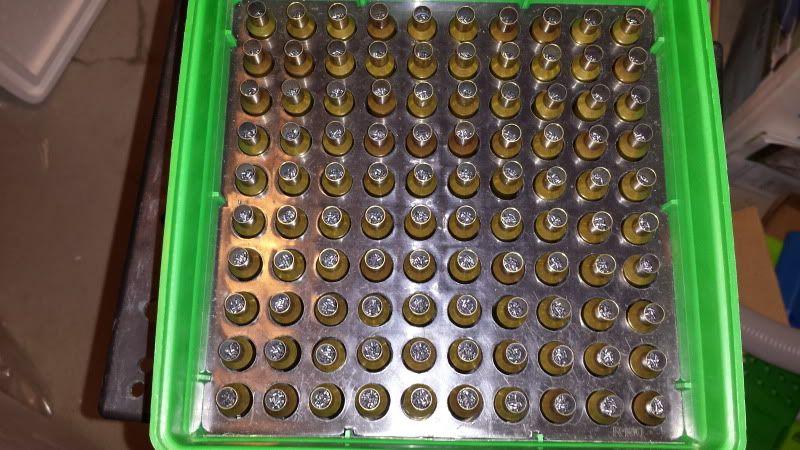
The first row across is my starting row; for example all are 40 gr. The 2nd row has a .2 gr increase (6.5x47Lapua) and so on and so on until the 10th row has 41.8 gr. I take small, light, handheld press to the range with me with the seating die already pre-adjusted to my desired setting depth. At the range, I fire one round at my steel target to confirm a hit and so I can adjust closer to my intended point of impact. In this case the center orange dot on the 4'x4" DirtyBird target. I then start up the ladder, seating one bullet and shooting; marking the POI on a separate sheet of paper. Even with my NF scope set at 22x I can see the hits. Once the ladder has been shot the MTM ammo box should look something like this.
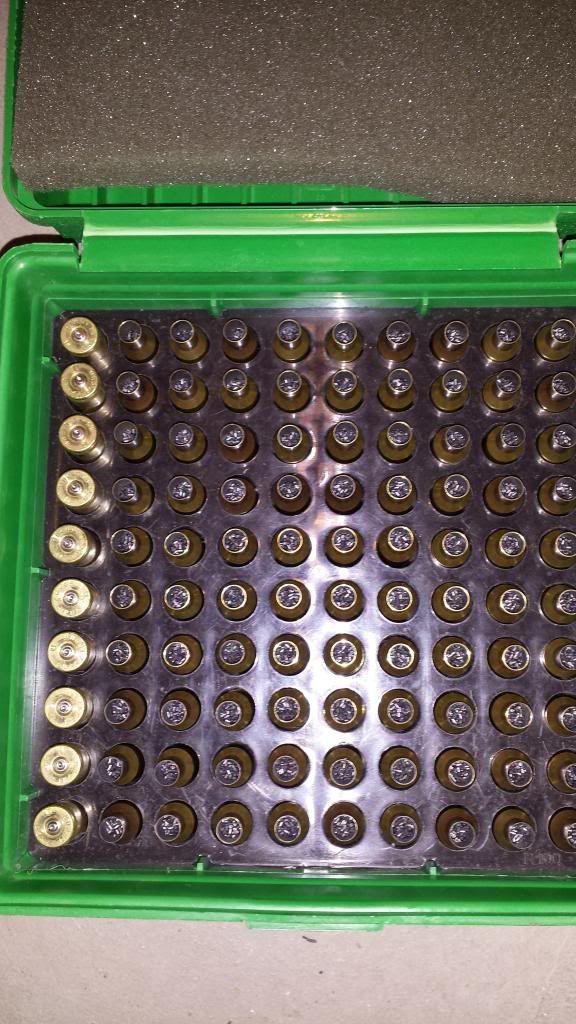
This ladder showed that 40.4, 40.6 and 40.8 gr showed promise. Now, I take the next 3 unloaded, charged, cases from the 40.4, 40.6 and 40.8 gr rows and seat bullets. I shoot each 3 cartridges at individual aiming spots for 3, 3-shot groups to see which group better. I'm especially looking for zero to nil vertical spread. Once I've done that the MTM box should look like this.
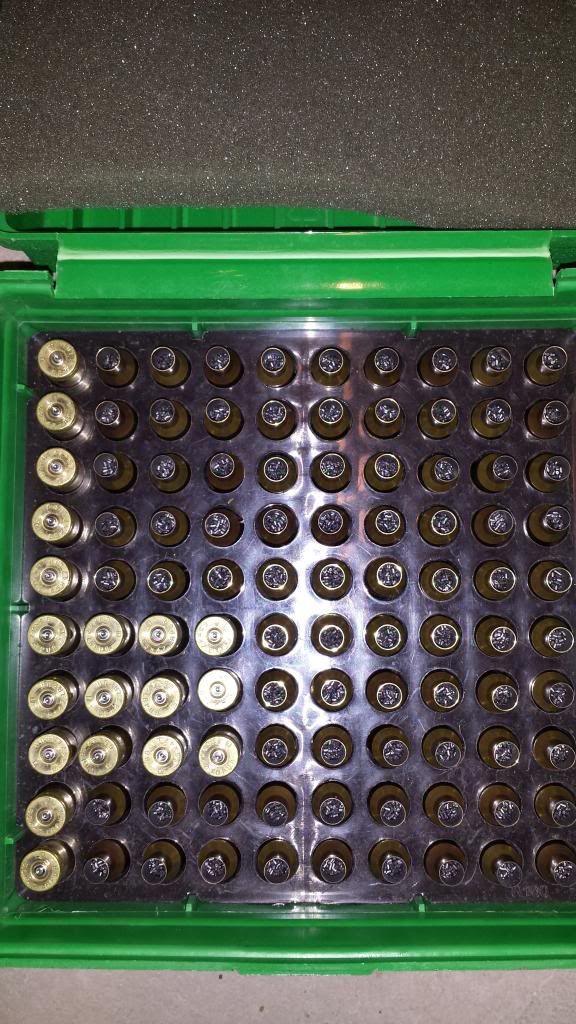
At this point I'm hoping to have narrowed it down to 1 or 2 different powder charges; say 40.6 and 40.8 gr. I then want to play a bit with seating depth; loading up 3 more of the same powder charge. Once I've shot those, my MTM box looks like this.
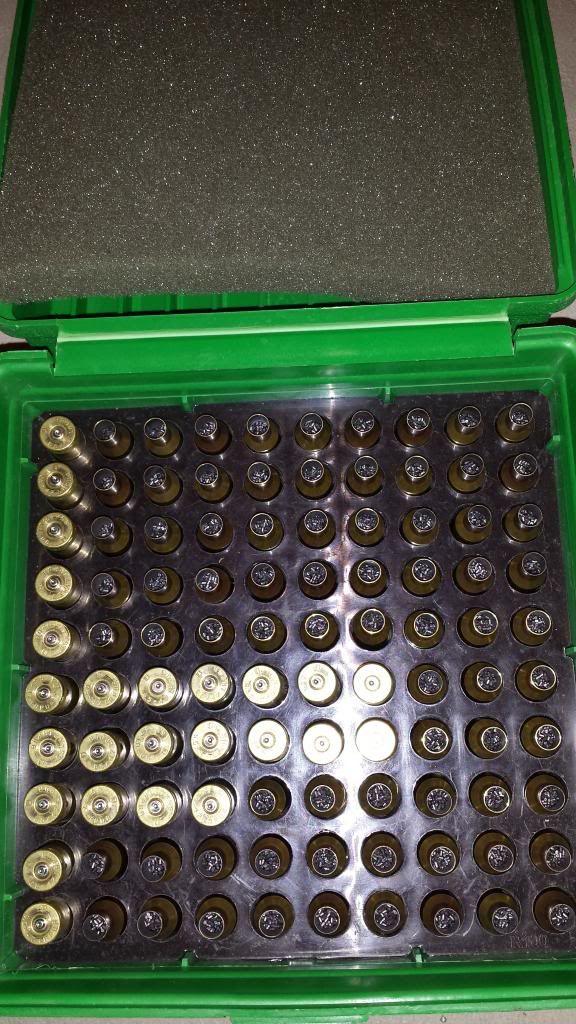
Now I may want to play a bit more with seating depth; going in or out a bit more….or……in the opposite direction. My box now looks like this.
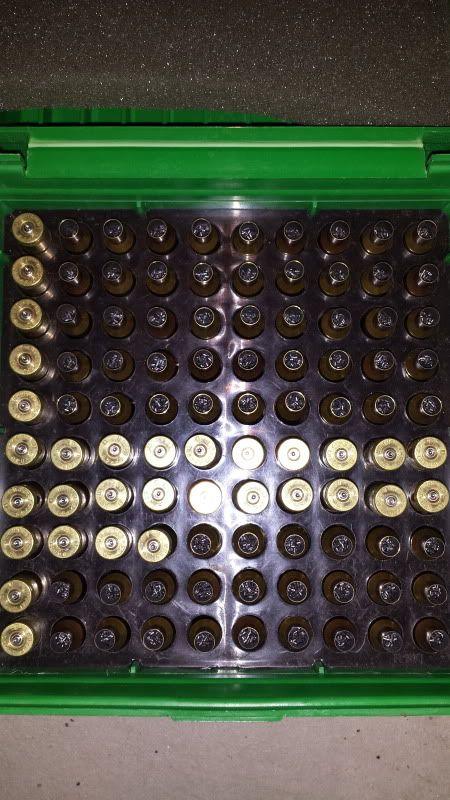
At this point, it's time to pack up and go home where I don't need to pull any bullets. I might want to play a bit more with seating depth or try different primers but the majority of my Audette Ladder testing is done and all in one trip and I've only shot a max of 31 rounds; saves on components and barrel life.
Questions?
Alan
 Nothing like shooting a ladder, getting home and watching a screen go black.


