isaaccarlson
Well-Known Member
I just finished bedding my 22-250. I shot it when I got it and was not impressed so I shimmed the action to test float the barrel and it shot absolutely lights out. I just left the paper shims in there for the last few years and they finally squished down far enough for the stock to touch the barrel when using a bipod and groups went south.
I used jb weld on this because I have used it in the past with excellent results. I have used JB kwik weld as well with excellent results, but I didn't have any left for this one.
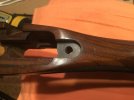
I bedded the tang first, because it sat low in the stock from the factory and I didn't like that. It was easy to do because it sat at the perfect height with shims under the front of the action and the barrel resting on the pressure pad. I removed some wood with the dremel and drilled some holes for mechanical lock. I used kiwi shoe polish for release agent.
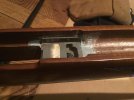
Once the tang was cured, I moved on to the recoil lug. I found a shim cut from a "credit card" was the perfect thickness once the shiny coating was removed. I wanted to use a shim in the bedding to make sure it ended up at the right height and level. I probably could have let the barrel rest on the pressure pad and tang, but wanted some extra insurance. Wood was again removed with the dremel and locking holes drilled. I used kiwi polish and jb weld with polymer clay dams. I put two layers of scotch tape on the rear of the tang to provide ~.005" recoil clearance. I went a bit thin on the mag well dam and had to do some quick cleanup and re-damming before setting it aside to cure. This prevented complete squeeze out along the sides of the action, but that's not something that worries me. I did have to do some filing on the action/recoil lug to fix a few negative angles. I did not want to make this a glue-in.
I popped it apart after about 6 hours to do some trimming and clean up the clay and put it back together. I removed any bedding that was under the barrel since it shot very well with the shims. It is a very snug fit and will stay in place by itself even when turned upside down. It has to cure until tomorrow.
The barrel channel will get opened up to .060" of clearance because I think it looks nice. It gives a bit of depth to the look of the rifle and provides some air for cooling.
I don't have any more of the ammo that it really likes, so I'll see how it likes something different. It shot factory 45 gr UMC HP into one single hole. Wish I had more of that!


