Annealing 338 Lupua and 6.5 Creedmoor Brass

The Builder

Active Member
Joined
Sep 30, 2023
Messages
25
Location
New York
Hey All, I am new to this site and looking forward to learning from you all and hopfully contributing to certain topics when I can.

My first question is what temperature do you recommand annealing 338 Lapua and 6.5 creedmoor brass?

For .338 Lapua I have Hornady and Lapua brass
For 6.5 I also have Hornady and Lapua brass.

I will be using a Brustfire Annealing Gen 2 Annealing station. If you have experince using this set up, I will love to know what timer you have set for each as well.

Look forward to hearing everyones personal experince and recommendations.
 
Temperatures should be between 600-800 F for brass annealing, I use a simple propane loop tip & toast them 30 seconds each. Propane has a burn temp. of 2700 - 3,500 F so when brass is exposed at tip of propane flame temps are about 900 -1100 F and 600-800 F should occur within 30 seconds. I stand the de-capped brass in 1/2 inch water & tip them over when toasted. It is best to do this in a darkened room so the heating process may be observed, dull red. Brass sizzles when tipped over. Ice cold water becomes warm to touch after toasting 50 pieces. Keep brass heads cool, like hard.

Neck walls run about .015 or slightly less - no difference between toasting 6.5 CM or others.
Thank you for this info Hugnot! This is pretty detail. I have the brustfire so you think it makes sense to keep a tray with ice cold water under it so when they fall out they land in the water? do you let them seat for a long period of time in the ice cold water?
 
30 Seconds is a LONG time to be heating brass.
Having it standing in water will help save the case head but when I put mine on flame annealer with a torch focused on the neck its usually 5-8 seconds depending on the brass.
The water quench does nothing to the brass.
 
Standing the brass in water will keep the brass heads cool & from being annealed.

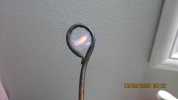
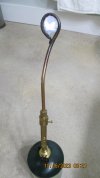
My flame tip looks like this:

IMG_2085.JPGIMG_2088.JPG

As seen, there is a moderate amount of yellow flame indicating incomplete combustion of propane caused by limited mixing of air. This reduces the flame temperature at the center of the ring to an estimated 600 - 800 F which is the temperature needed to anneal, enlarging brass crystal size. Using a conventional torch will produce a much hotter focused flame because more air is mixed with the propane, max temperatures with this type of torch might exceed 3,000 F which is excessive & liable to heat & anneal more brass than needed. Brass will melt at about 1,700 F.

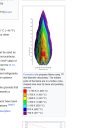
Screenshot (742).png

End of flame tip > 477 C = 477 * 9/5 + 32 = 891 F -- like as boiling point water in Cs is 100 or 100 * 9/5 + 32 = 212 F
Surface of brass not contacting flame tip.


Allowing 30 seconds per piece assures consistent annealing. Brass or torch does no need to be rotated. Brass color gets dull red after 15-20 seconds with another 10-15 to assure consistency. Tipping the cases over upon annealing assures cases will not be toasted more than 1X. Cases are annealed to a point just below the shoulder. Neck tension is more consistent. Loupy flame tip cost less than $40 (real cheap).

Tipping brass into cold water or allowing it to slow cool makes no difference for annealing or enlarging crystalline structure reduced in size by work hardening. The goal is to eliminate brass spring back for uniform neck tension.

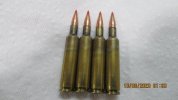
Photos of 6mm AI rounds ( 87 VMax @ 3475) that have annealed brass & neck turned after 5 loadings:

IMG_2089.JPG

These shoot real good & upon bullet seating, force needed to seat bullets appears to be constant. A 6mm Lee factory crimp die is the last step.
 
Last edited:
I have been using a propane torch from Walmart. I spin the case slowly in a deep socket in a drill. I do this in a room with the lights pretty much off to see the red glow start on the case necks. Haven't timed it, but it has to be a good 30 seconds. We then dump them on a stack of water soaked paper towels and roll them around with a soaked rolled up paper towel.
I have wondered if a hotter torch would be better? Get the neck red faster and transfer less heat on down the case. I have heard MAP is hotter but I have also heard the "new MAP" isn't.

Anyone use a different torch other than propane? Would different tips produce hotter results? Would faster be better?
Our cases look like most factory annealed cases when done.
 
Standing the brass in water will keep the brass heads cool & from being annealed.

My flame tip looks like this:

View attachment 499600View attachment 499601

As seen, there is a moderate amount of yellow flame indicating incomplete combustion of propane caused by limited mixing of air. This reduces the flame temperature at the center of the ring to an estimated 600 - 800 F which is the temperature needed to anneal, enlarging brass crystal size. Using a conventional torch will produce a much hotter focused flame because more air is mixed with the propane, max temperatures with this type of torch might exceed 3,000 F which is excessive & liable to heat & anneal more brass than needed. Brass will melt at about 1,700 F.

View attachment 499603

End of flame tip > 477 C = 477 * 9/5 + 32 = 891 F -- like as boiling point water in Cs is 100 or 100 * 9/5 + 32 = 212 F
Surface of brass not contacting flame tip.


Allowing 30 seconds per piece assures consistent annealing. Brass or torch does no need to be rotated. Brass color gets dull red after 15-20 seconds with another 10-15 to assure consistency. Tipping the cases over upon annealing assures cases will not be toasted more than 1X. Cases are annealed to a point just below the shoulder. Neck tension is more consistent. Loupy flame tip cost less than $40 (real cheap).

Tipping brass into cold water or allowing it to slow cool makes no difference for annealing or enlarging crystalline structure reduced in size by work hardening. The goal is to eliminate brass spring back for uniform neck tension.

Photos of 6mm AI rounds ( 87 VMax @ 3475) that have annealed brass & neck turned after 5 loadings:

View attachment 499602

These shoot real good & upon bullet seating, force needed to seat bullets appears to be constant. A 6mm Lee factory crimp die is the last step.
Interesting torch head.
 
I am not an annealer of brass but have made a fair amount of springs which does not use brass obviously, so have a question. Has anyone ever tested brass that's been slow cooled vs quench cooled? I would have expected more brittleness after the cold quench.
Steel quench hardens. Brass work hardens. Dropping brass into water does not harden it like steel.
 
Standing the brass in water will keep the brass heads cool & from being annealed.

My flame tip looks like this:

View attachment 499600View attachment 499601

As seen, there is a moderate amount of yellow flame indicating incomplete combustion of propane caused by limited mixing of air. This reduces the flame temperature at the center of the ring to an estimated 600 - 800 F which is the temperature needed to anneal, enlarging brass crystal size. Using a conventional torch will produce a much hotter focused flame because more air is mixed with the propane, max temperatures with this type of torch might exceed 3,000 F which is excessive & liable to heat & anneal more brass than needed. Brass will melt at about 1,700 F.

View attachment 499603

End of flame tip > 477 C = 477 * 9/5 + 32 = 891 F -- like as boiling point water in Cs is 100 or 100 * 9/5 + 32 = 212 F
Surface of brass not contacting flame tip.


Allowing 30 seconds per piece assures consistent annealing. Brass or torch does no need to be rotated. Brass color gets dull red after 15-20 seconds with another 10-15 to assure consistency. Tipping the cases over upon annealing assures cases will not be toasted more than 1X. Cases are annealed to a point just below the shoulder. Neck tension is more consistent. Loupy flame tip cost less than $40 (real cheap).

Tipping brass into cold water or allowing it to slow cool makes no difference for annealing or enlarging crystalline structure reduced in size by work hardening. The goal is to eliminate brass spring back for uniform neck tension.

Photos of 6mm AI rounds ( 87 VMax @ 3475) that have annealed brass & neck turned after 5 loadings:

View attachment 499602

These shoot real good & upon bullet seating, force needed to seat bullets appears to be constant. A 6mm Lee factory crimp die is the last step.
where do you get the hoop torch tip?
 
I am not an annealer of brass but have made a fair amount of springs which does not use brass obviously, so have a question. Has anyone ever tested brass that's been slow cooled vs quench cooled? I would have expected more brittleness after the cold quench.
opinions on the net are all over the place but here are a few responses from shooting/reloading forums:
You can cool it as slowly or as quickly as you like and it won't matter. The myth that you need to quench brass comes from the requirement to do so when heat treating some kinds of steel.

Brass CAN be quenched (better called "cooled very quickly") without losing the affects of the softening that comes from annealing the case mouths. Rapid cooling does NOTHING to the annealed soft brass - it stays soft.

Unlike steel, which will be made harder when it is cooled rapidly, brass is virtually unaffected when it is rapidly cooled. Annealing brass and suddenly quenching it in water will have no measurable effect on the brass. Annealing–Basic Concepts by Jim Harris and Ken Light
Full article on Accurate Shooter.com :
 
Top